Providing a Clear Path Through Your Course

Providing a Clear Path Through Your Course

As you plan your course, consider how you will structure your Canvas site to make clear to your students where to find and access the materials and platforms you will be using.

Students have reported difficulty orienting to the variety of different platforms, external resources, and organizational structures used in the different courses they take. Taking care to provide a clear, consistent organizational structure will help your students devote more of their cognitive effort to your course content and less to finding materials and figuring out the plan for the week. Below are some suggestions you can implement to design and organize your course materials more clearly and communicate that organization to your students.

If you make major changes to the organization of your Canvas site after the term has begun, be sure to communicate with the class about the new structure and your reasons for the change.

Use Modules in Your Canvas Site

When you organize your Canvas site, it’s helpful to use Modules to aid student understanding about what resources, activities, and assignments you have planned for them, and the order in which you would like them to access and complete those tasks. A good way to do this is to create a module for each week of the term, topic, or textbook chapter you will discuss. Putting all required materials into the weekly module obviates the need for students to look elsewhere for resources, a task they often find confusing. An example site is shown below. Notice that direct access to Quizzes, Discussions, Assignments, and Pages from the blue menu at the left is disabled for students, requiring them to use Modules to navigate and access materials. This declutters the menu and provides students with a single path for finding all the items they need.

Learn more about using a Welcome Module in your course, including a link to a sample Welcome Module for download.

Content Modules and Introduction Pages

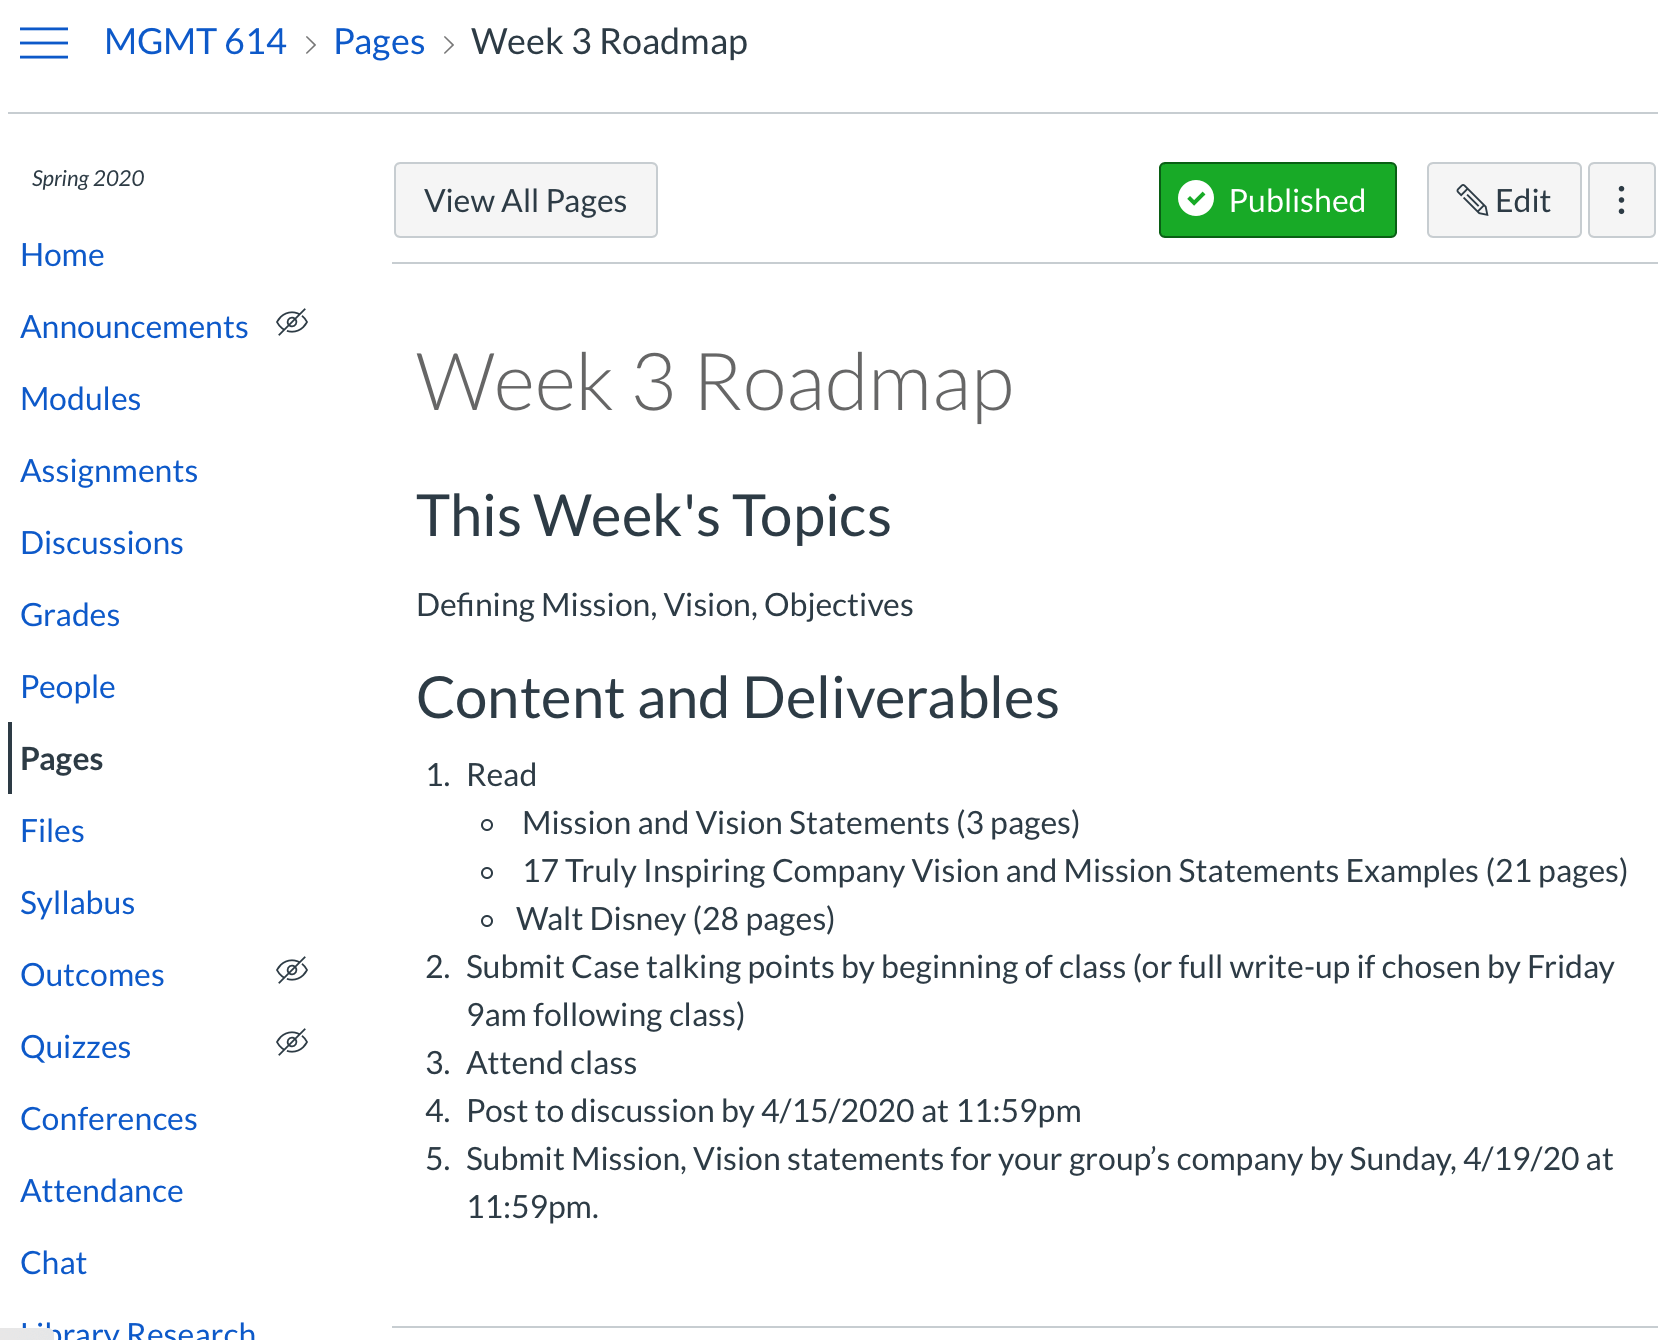
The structure of your content modules might vary depending on whether you are teaching a face-to-face course or if your class is “online,” including only asynchronous elements. In either case, as discussed below, it is useful to include an Introduction or Overview page at the top of each module that communicates your plan for the week, topic, or chapter, a detailed list of tasks the students should complete, and a list of the intended learning outcomes the lessons address. If you want to require that students access the materials in a particular order, see the instructions here.

Below are examples of modules for fully online courses and ones with synchronous class meetings.

Modules for fully online courses

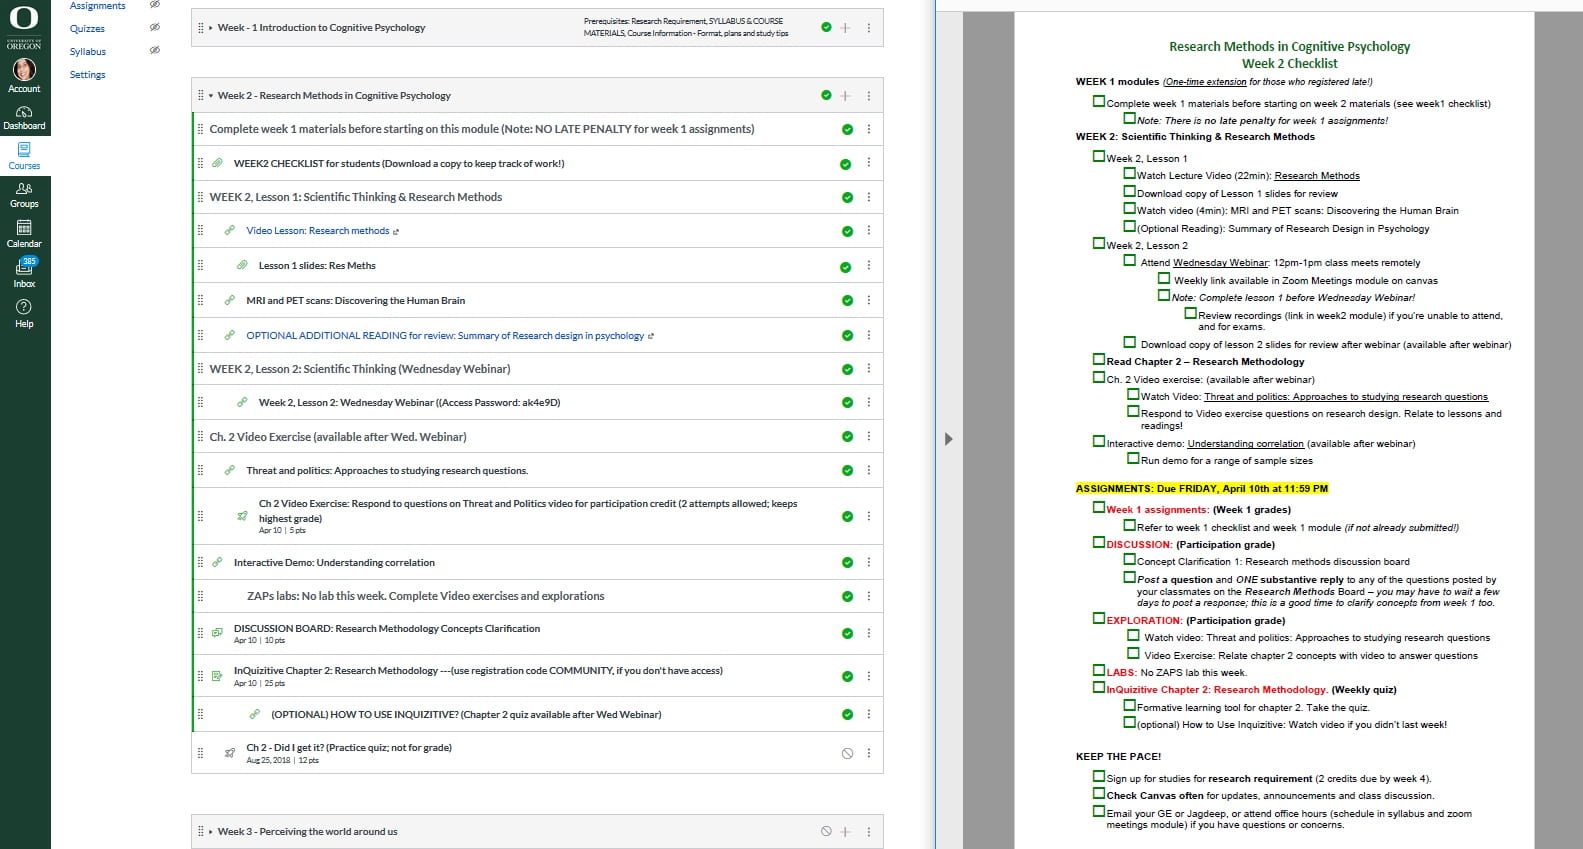
If your course is “online”, with only asynchronous elements, the rest of the module should just contain links to the resources, assignments, and other items mentioned in the Introduction page, as shown in the example below. Indentation can help indicate relationships between different materials in the module. And the order of the items in the module should correspond to the order in which you would like students to complete them.

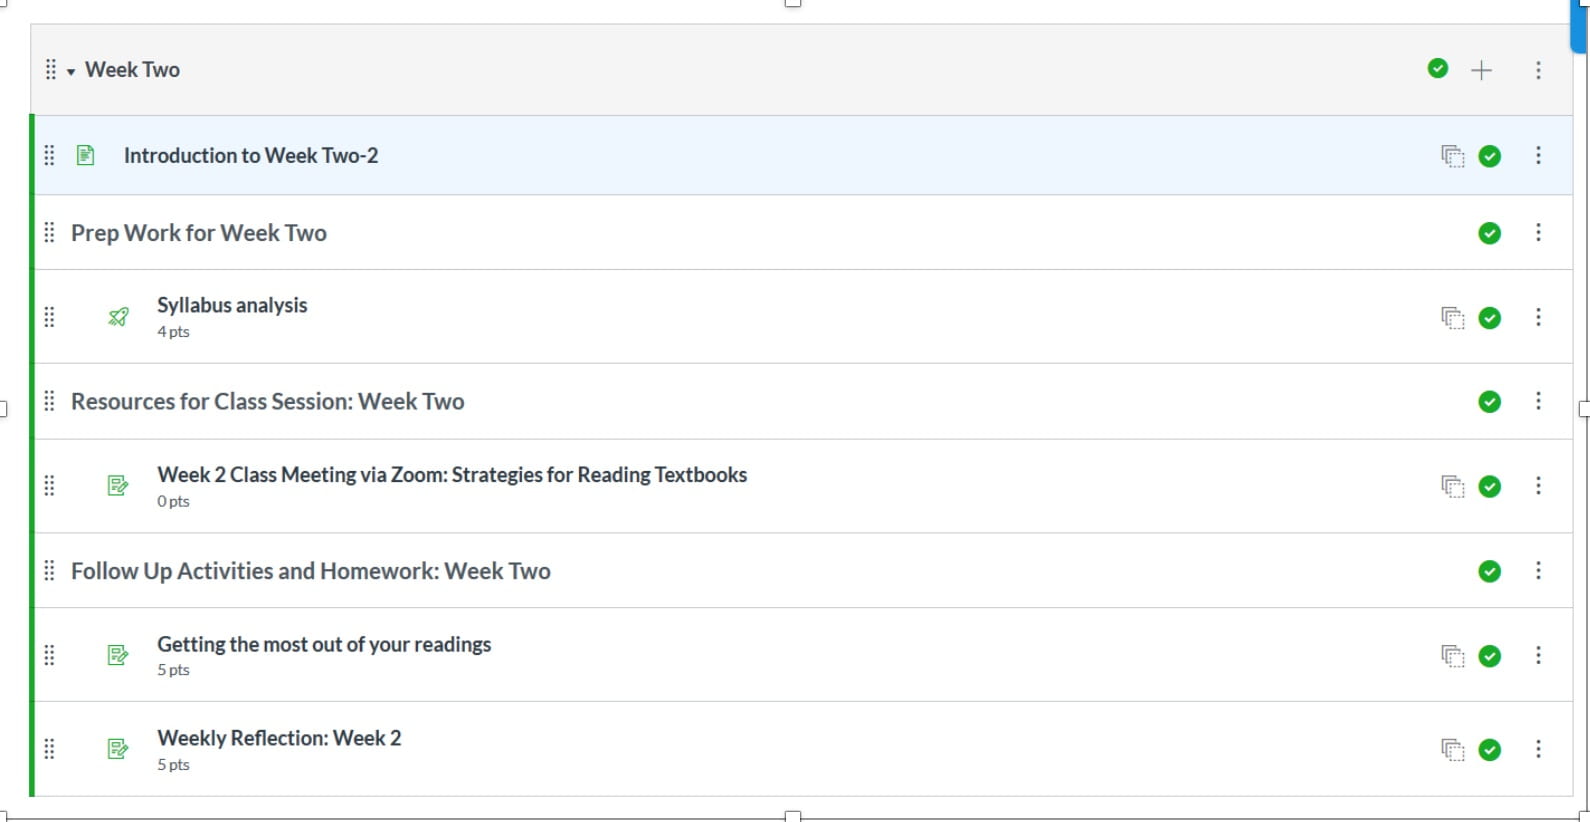
Modules for face-to-face or hybrid courses

If you are teaching a face-to-face or hybrid course, it’s helpful to use text headers to group entries into things students should do to prepare for class, materials needed for the class session itself (including a link to the Zoom meeting, if appropriate), and tasks they should complete as follow-up to the class session. An example is shown below. Note that indenting helps visually organize the module.


Have a Stable Wayfinder

Make sure there is a logical, consistent place students can go to learn which materials they will need to access for each week or lesson and where to find them. The Introduction/Overview page in a weekly module, introduced above in the section on modules, is a good example of a wayfinder. Two such pages are shown below, the first from the Runway program and the second from faculty member Lindsey Holts. Note that the task lists are numbered and indented, making them easy to pick out and read. Each entry in the list should ideally contain a link to the material and the entries are descriptive enough to give a sense of what you expect, but the details are in in the linked materials. Including the intended learning outcomes here and on individual assignments helps crystallize the idea that all the work you assign is designed with a distinct purpose.


Runway program

Lindsey Holts: MGMT 614

Screen shot of a "Week 3 Roadmap" of students' action items

Use naming conventions

Have a consistent system for naming assignments, files, videos, etc. that indicates the week, topic, or textbook chapter the material is associated with. For example, Reflection: Week 1 or Follow-up Homework: Chapter 2. Similarly, if you create student groups in Canvas, be sure to give the groups descriptive names that include the course number or title, as students can see a single list of the groups they are part of across all their courses.

Use the Canvas To-Do List or other weekly checklist

When an assignment or quiz with a due date is created in Canvas, that task is automatically placed on the student's Canvas to-do list. Pages, which don’t have due dates, can also be added to the to-do list. So it can be helpful to create an assignment or quiz in Canvas even if it is just a placeholder for work students will actually submit elsewhere. Doing this will also allow you to record the grade in the Canvas gradebook. Jagdeep Bala says her students really appreciate weekly checklists like this:

Jagdeep Bala

A screenshot of a detailed student checklist.

Use Transparent Design

When you assign readings, work to be handed in, or other student tasks, use the TILT Transparent Assignment Template: be explicit about the purpose, task, and the criteria for success in the work.  Provide a detailed list in the “task” section that includes all the steps students will need to follow to complete the assignment, and links to any outside materials they will need to access.

Provide Navigation Guidance for Your Students

Now that you’ve done all this planning, it’s important to communicate directly with students about your course organization and where and how to find materials. To do this, you might:
  • Make a tutorial video that demonstrates how to navigate your Canvas site and how to access any additional platforms, sites, or technology you will ask students to use in the course. You could make the video yourself or recruit a reliable student(s) to create it; the latter is useful because the instructor’s screen setup in a site is not always the same as the student’s.
  • Talk about it in class. Spend a few minutes during a synchronous class meeting sharing your screen as you click through and talk about your Canvas site and demonstrate how to access materials on other platforms.
  • Write a “Start Here” document that walks students through the platforms you are using and what students need to do to find and access materials in each platform. Consider including screenshots of relevant pages.