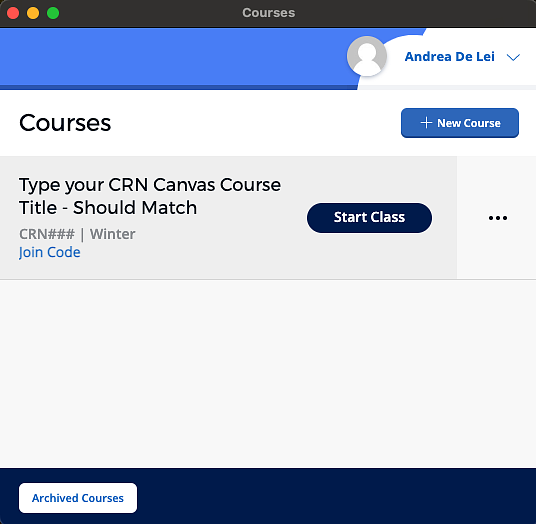
- Step 1: Set Up Your iClicker Cloud Instructor Account.
-
- Ensure you have an iClicker Cloud instructor account and a course created.
- Visit Getting Started with iClicker Cloud for more information.
- Step 2: Customize your attendance settings
-
In the web app, Customize your attendance settings:
- Log in at iClicker.com, click on your course, and then click 'Settings' to customize your attendance settings.

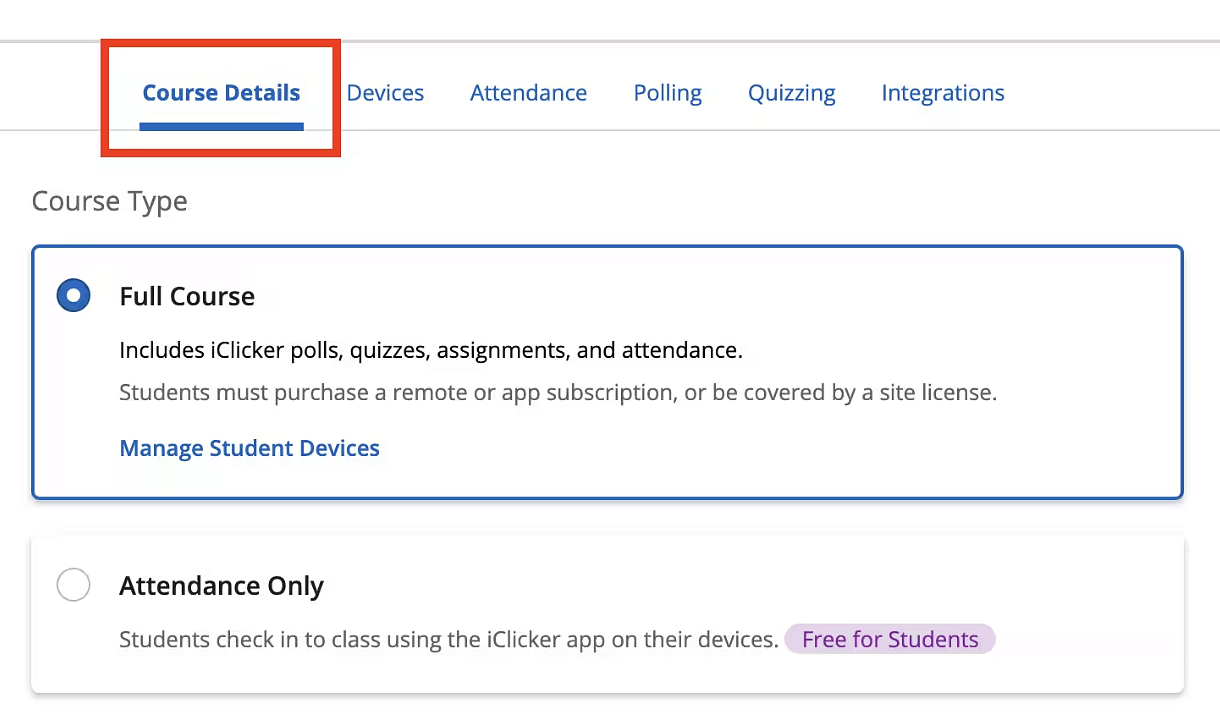
- Step 3: Select Course Type
-
- In the course details tab, choose the appropriate setting under 'Course Type'.
- Choose ‘Full Course’ if you want to take attendance with the option of polling and quizzing.
- Step 4: Customize Attendance Tab
-
- In the 'Attendance' tab, keep the default setting on to automatically take attendance when you start a session.
- Set Up Alerts:
-
In the web app, Customize your attendance settings:
- Customize alerts to highlight students who miss a certain number of classes.
-
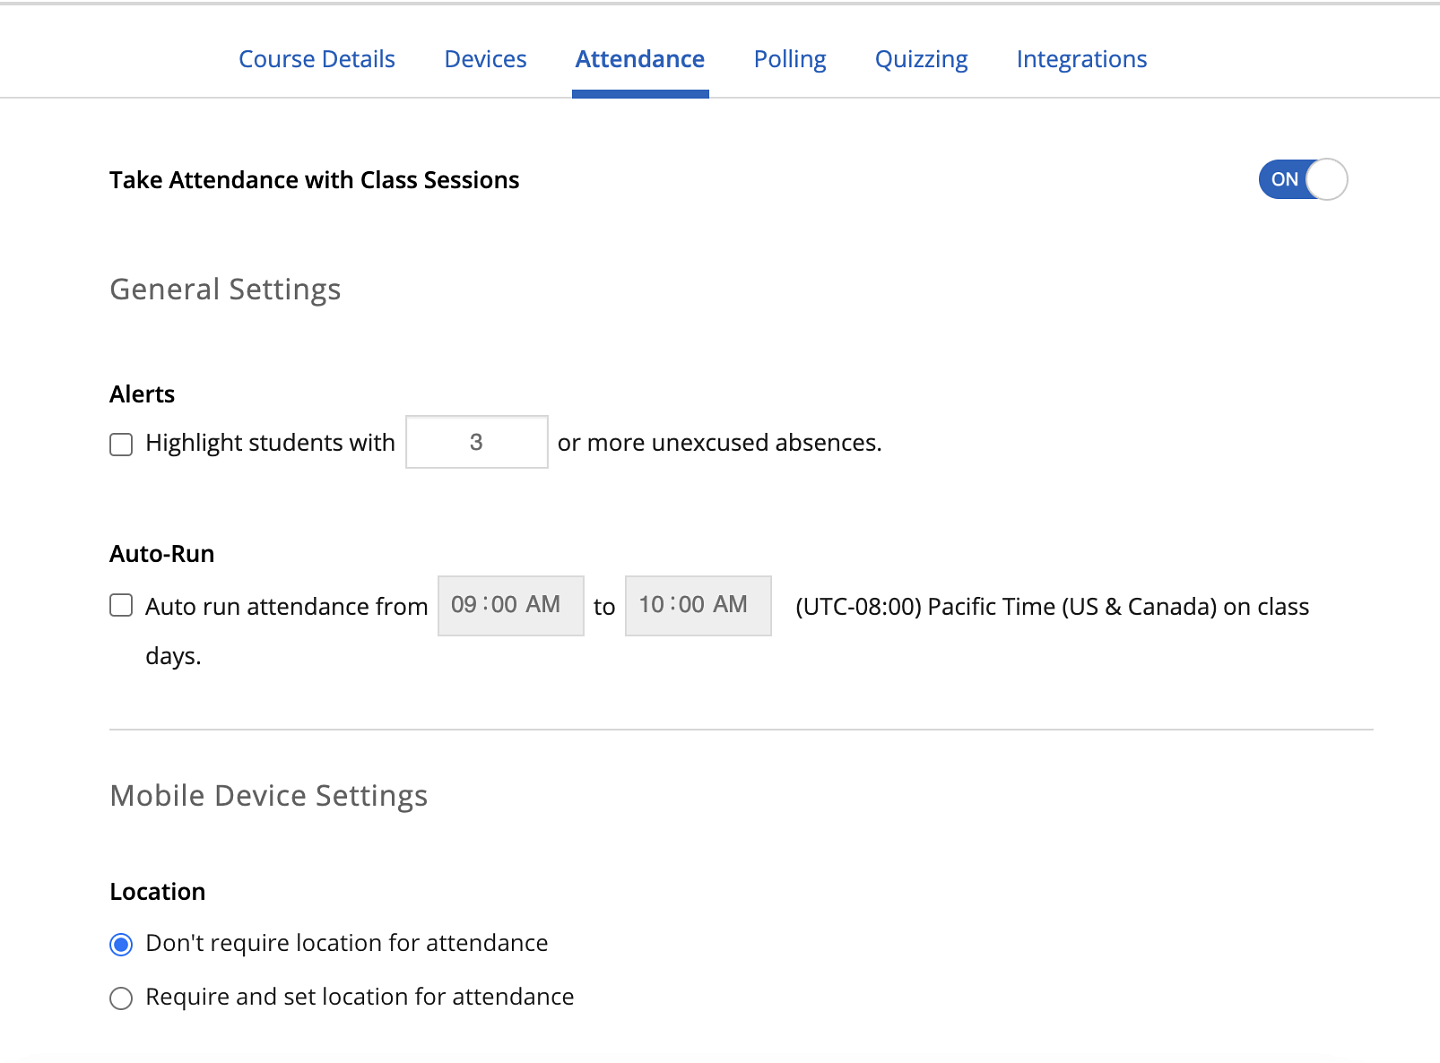
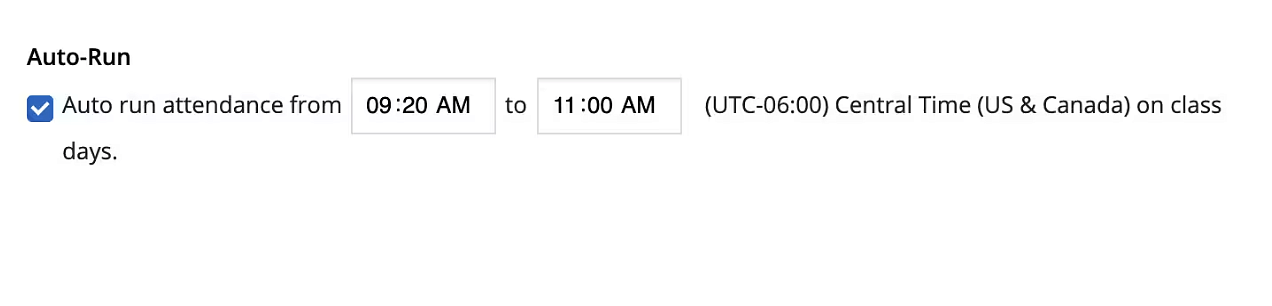
- Step 5: Configure Auto-Run
-
-
Choose whether the attendance session should start automatically based on your class schedule.
-
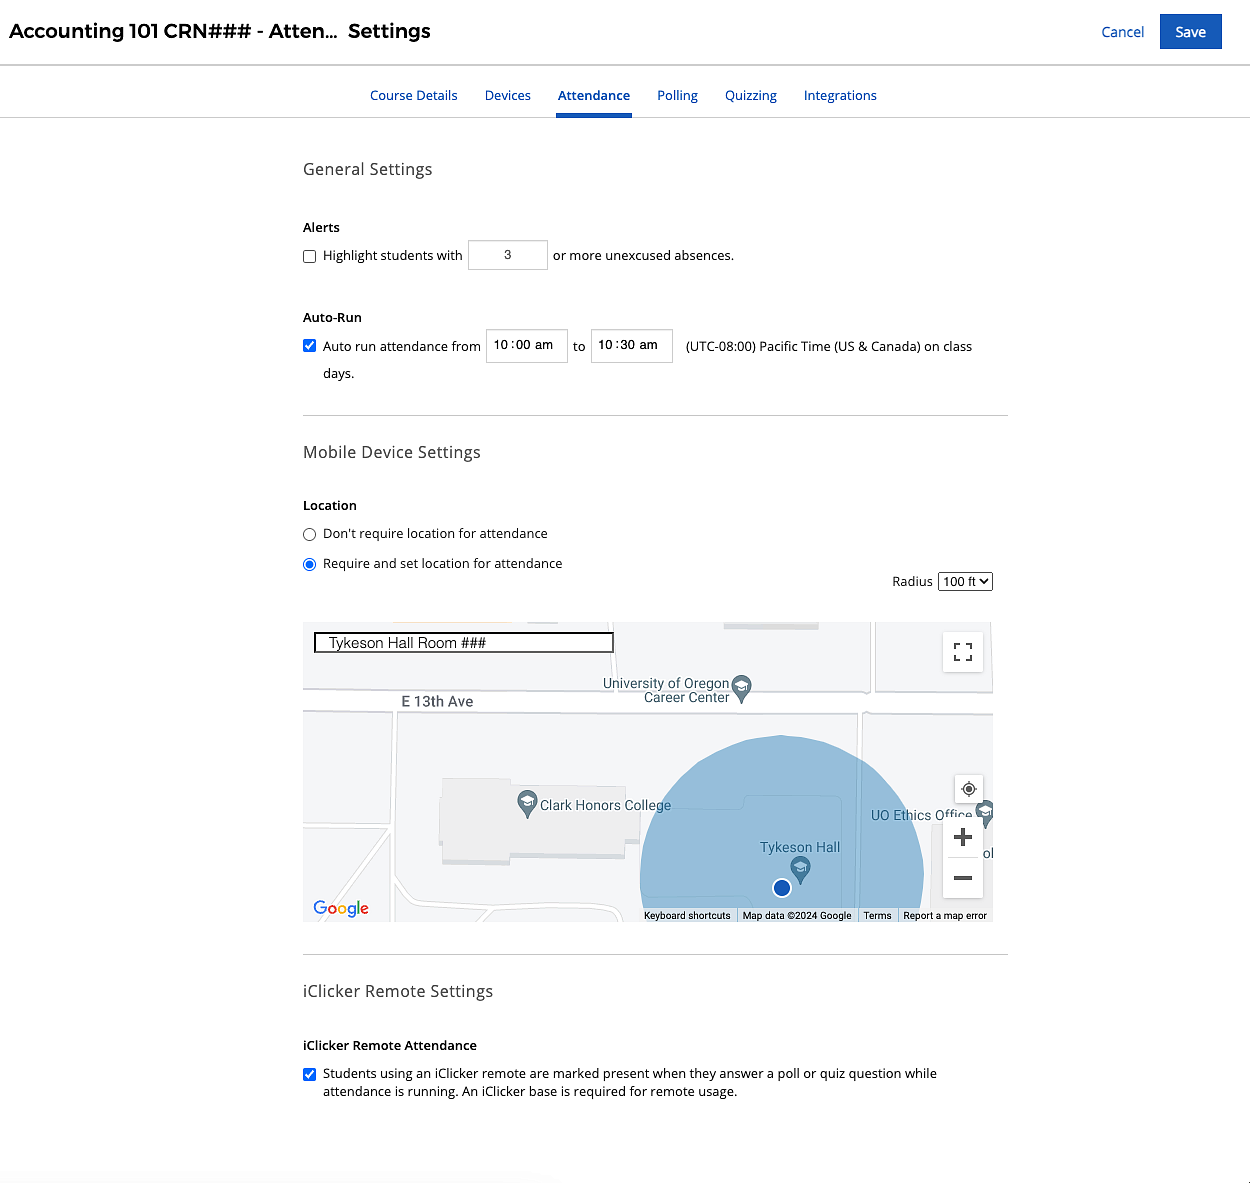
- Step 6: Location Setting Customization
-
In the web app, Customize your attendance settings:
-
Optionally, require location for students to check in.
-
iClicker Cloud: Taking Attendance
iClicker Cloud: Taking Attendance
This document guides instructors using the iClicker Full Course feature in iClicker Cloud.
Before proceeding with this checklist, confirm that your iClicker Cloud account setup is complete. For account setup instructions, visit Getting Started with iClicker Cloud.
Related Topics:
iClicker
Part 1: How to Set Up Your Course for Attendance
Part 2: Run an Attendance Session.
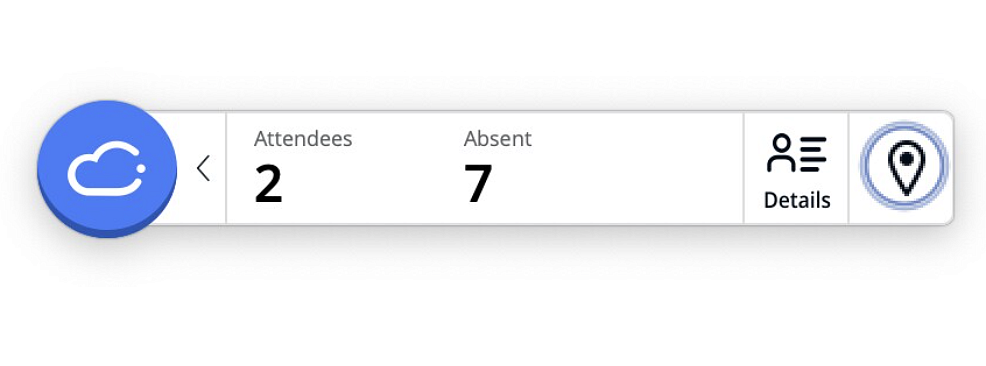
- Step 1: Start the attendance session.
-
- Manually start by clicking 'Start Class' or rely on 'Autorun' if set up.
-
Monitor the active class session panel for session duration and student check-in statuses.
-
Instruct students to join the class session and select the "Roster" icon.
-
When you start class, your session becomes active and ready to join. Instruct students to join the session and wait for your Polling or Quizzing activity to begin. Select the Roster icon on the iClicker toolbar to see how many students have joined the session.
-

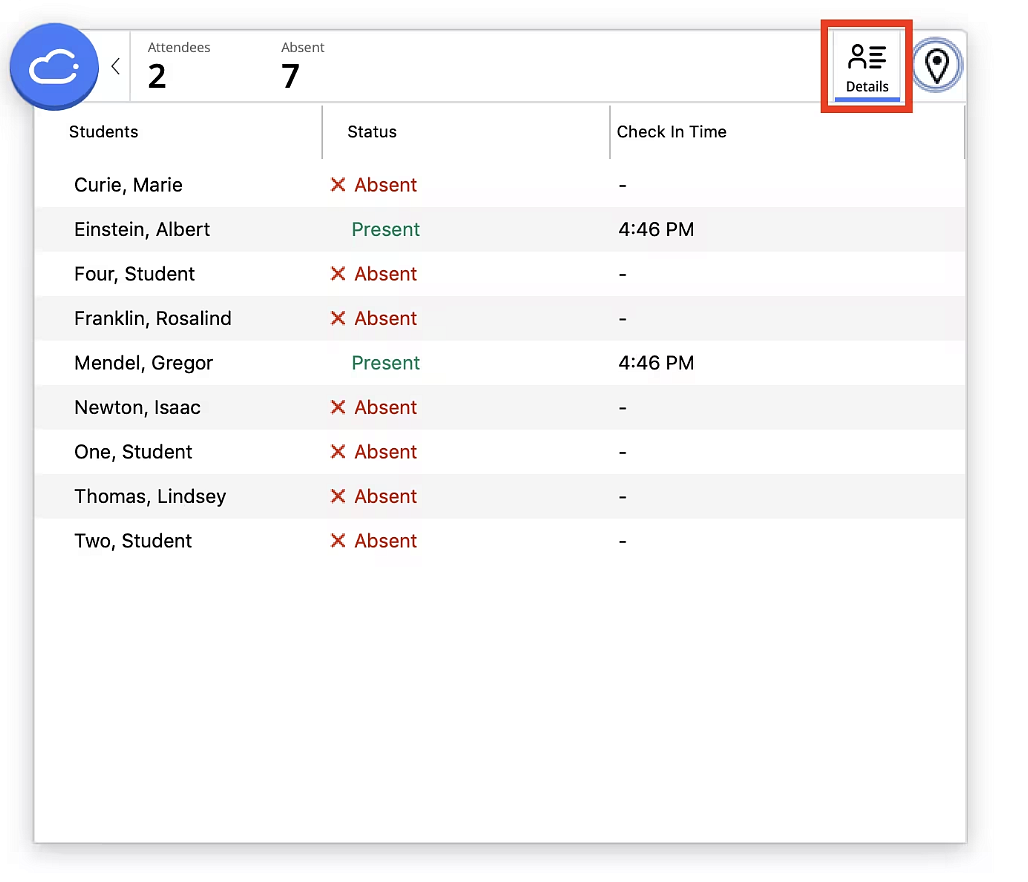
- Step 2: Manage student check-ins.
-
-
View checked-in students and those yet to check in.
-
If location requirement is enabled, you can temporarily disable it for accommodating technical issues.
-
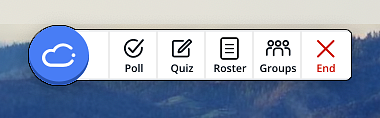
- Step 3: End the attendance session.
-
- If set to 'Autorun,' the session ends at the specified time.
-
You can manually end the session at any time by clicking 'End'.
Part 3: Manage the Attendance Data After Class
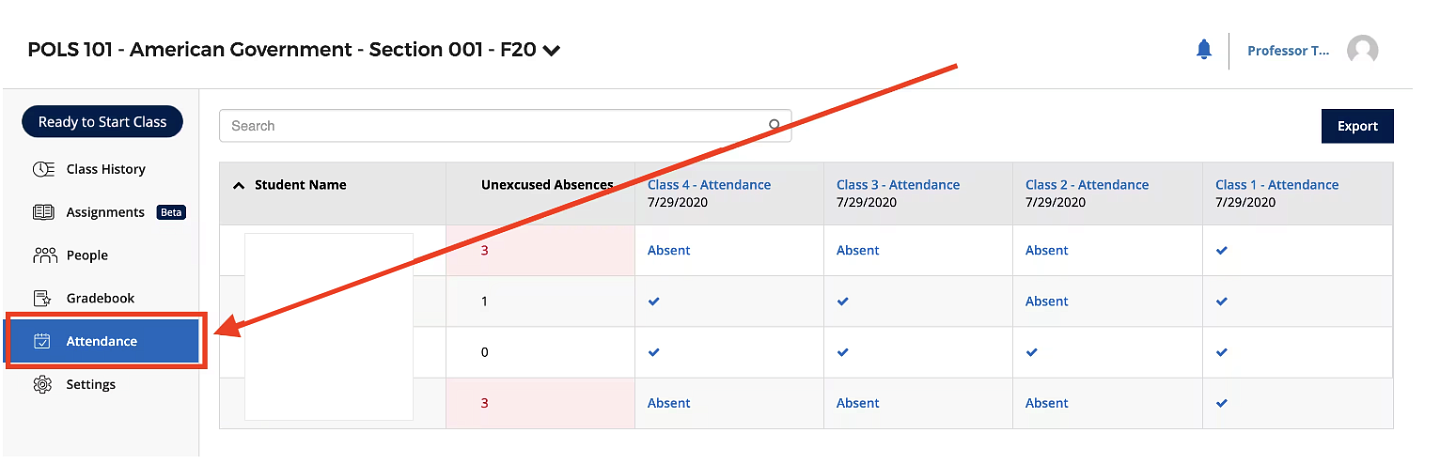
- Step 1: Access attendance records.
-
-
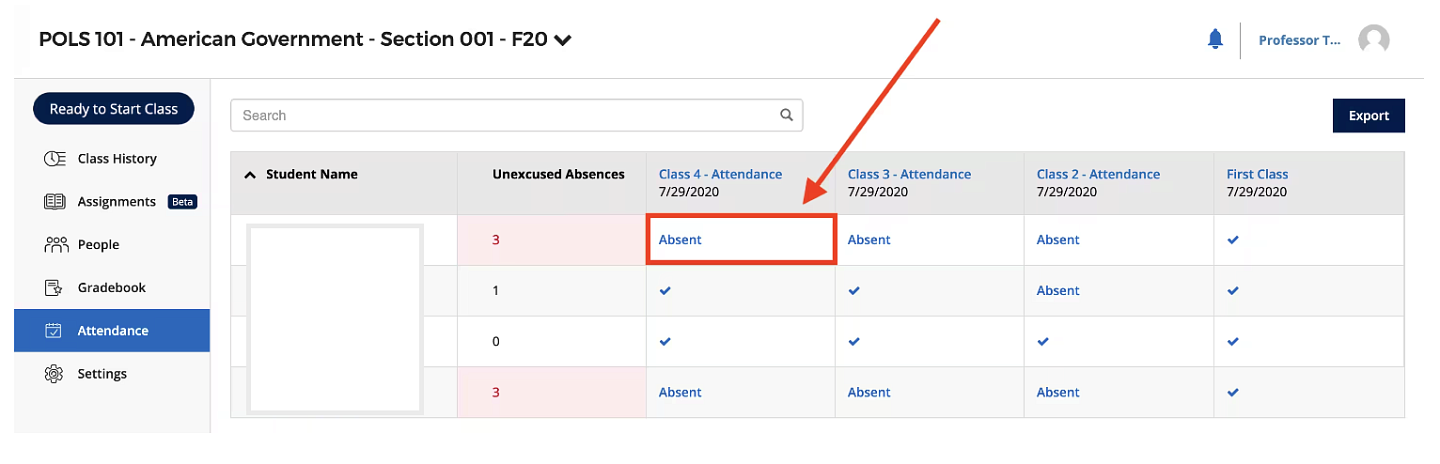
In the iClicker website instance, go to the 'Attendance' tab to view all student attendance records.
-
- Step 2: Edit attendance records.
-
-
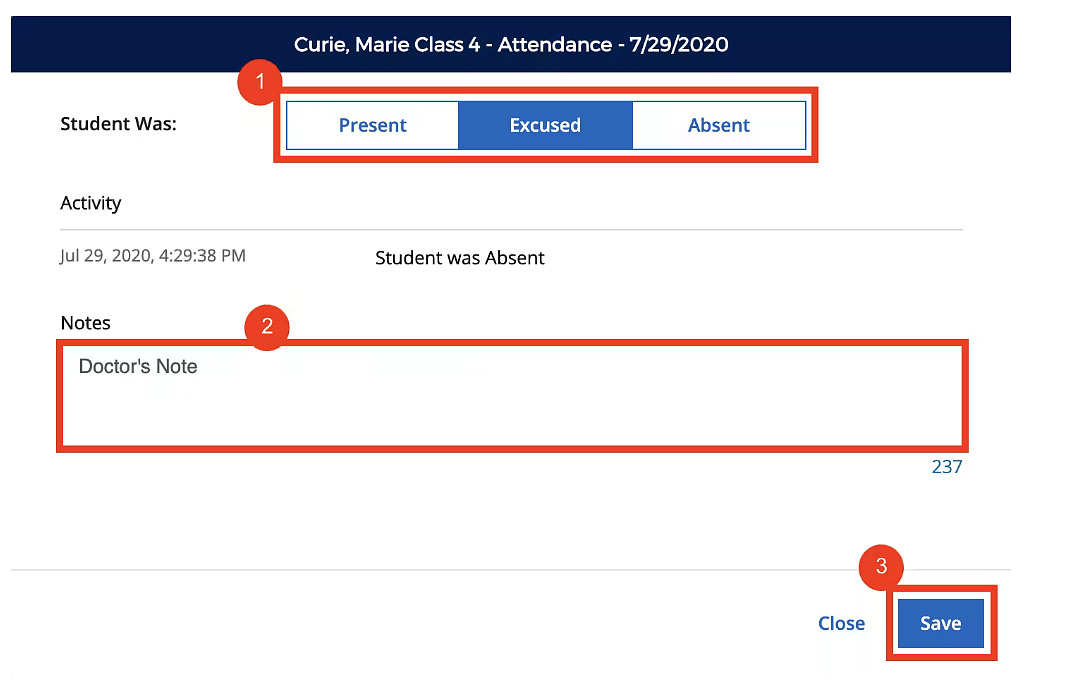
Manually change a student's attendance status or add notes by clicking on the relevant cell.
-
Edited cells are indicated with a grey triangle.
-
- Step 3: Delete or export data.
-
-
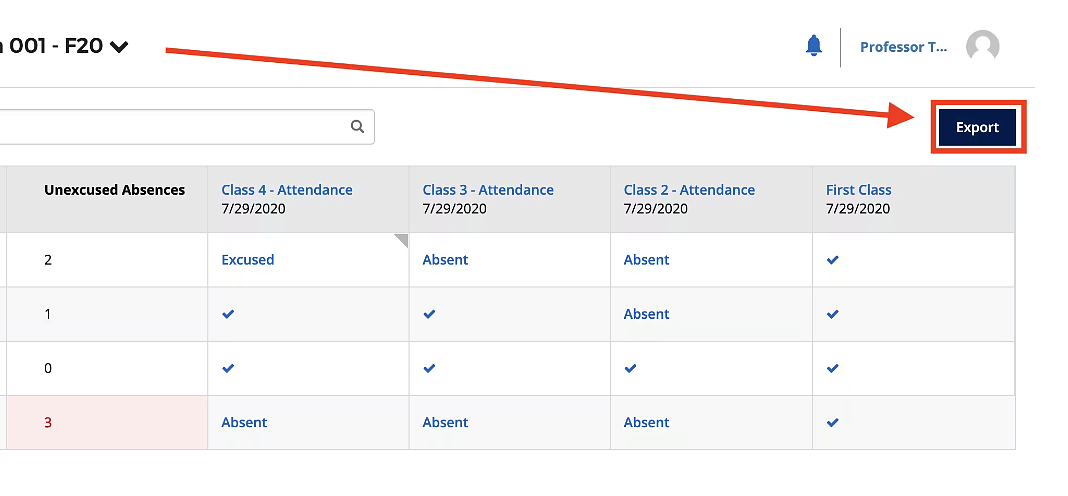
Delete an entire session if needed by clicking the title of the column for the desired class session. Choose delete activity in the window that appears and confirm delete.
-
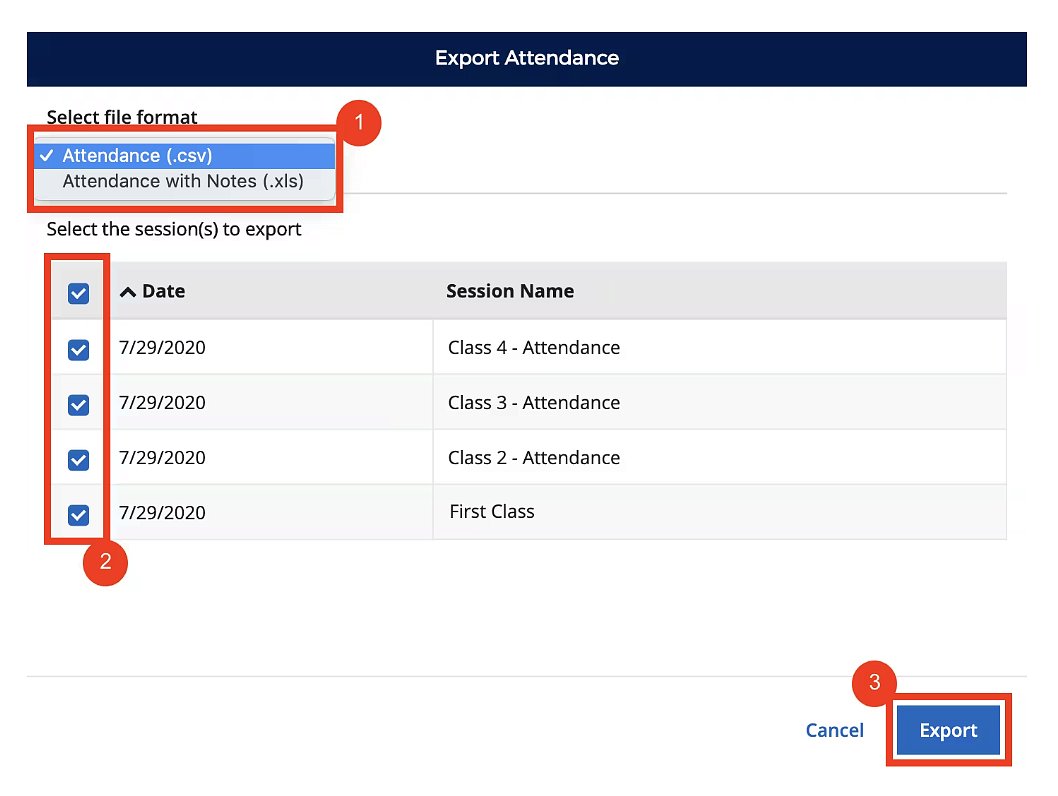
Export attendance data to a spreadsheet by clicking 'Export,' which opens a window where you can check the sessions for whose data you want exported. Click ‘Export’ in that window to download the data into a spreadsheet.
-
Part 4: Exporting Data
- Step 1: Export Attendance Data.
-
To download data into a spreadsheet, click 'Export' and select desired sessions.
iClicker Support
If you have additional questions, you can search or filter the iClicker Knowledge Base (link opens in a new tab)
You can also contact the following individuals directly:
- Melissa O'Brien: melissa.obrien@macmillan.com
- Brendan Baruth: brendan.baruth@macmillan.com