iClicker Cloud: Polling

iClicker Cloud: Polling

How to Use iClicker Cloud Polling: A Guide for Instructors 

This guide provides step-by-step instructions for instructors on how to effectively use iClicker Cloud Polling. Ensure you have downloaded the iClicker Cloud desktop software, created an iClicker Cloud instructor account and course, and prepared questions in your lecture presentation deck. 


Related Topics: iClicker

Part 1: How to Set Up Your Course for Polling

  • Add polling questions to your lecture slides. Lecture slides will be used to show students the polling questions Iclicker would display during the polling session. 
Step 1: Create an IClicker Cloud instructor account.
  • Download iClicker Cloud Desktop Software: Ensure you have the iClicker Cloud desktop software installed.
  • Create iClicker Cloud Instructor Account and Course: Set up your instructor account and course in iClicker Cloud. 
  • Refer to the Getting Started with iClicker Cloud how-to page.
Step 2: Prepare Lecture Presentation:
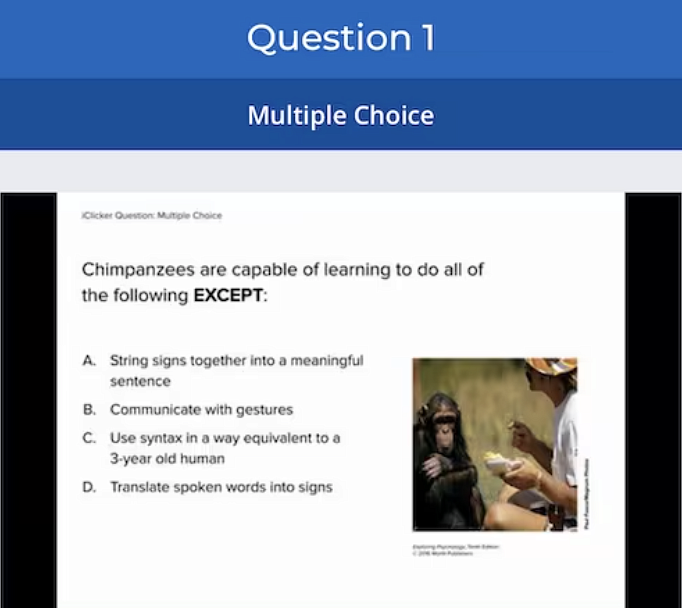
  • Prepare Lecture Presentation by add polling questions to your lecture slides. IClicker will uses these lecture slides to display the polling questions.

Part 2: Starting a Poll

Step 1: Launch iClicker Cloud Software.
  • Open the iClicker Cloud desktop software and log in. 

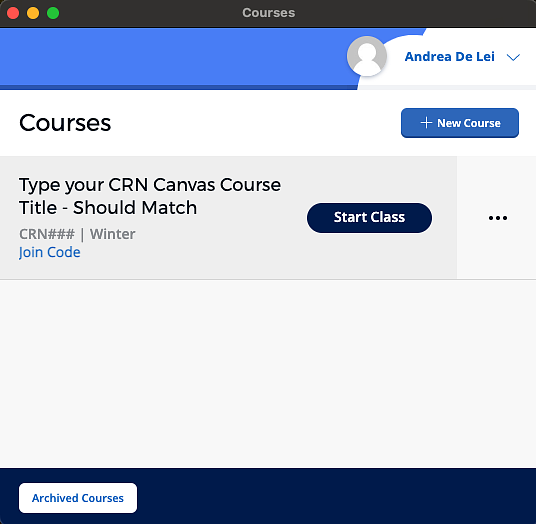
Step 2: Select Course and Start Class.
  • Choose your course from the list and click 'Start Class' to access the toolbar.

Start your Canvas Course Image
Step 3: Open your Presentation Tool.
  • Launch your lecture presentation tool (e.g., Microsoft Powerpoint).

Part 3: Conducting a Poll

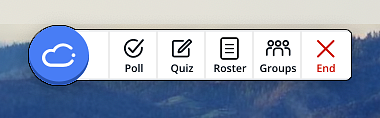
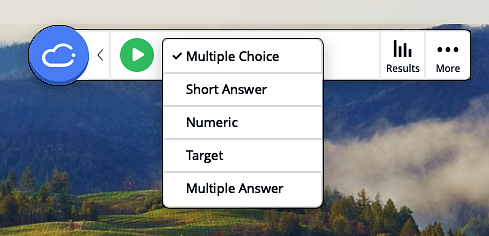
Step 1: Initiate Poll
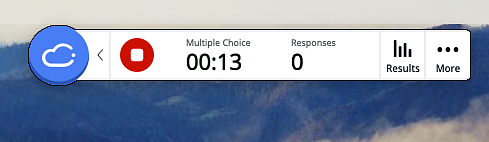
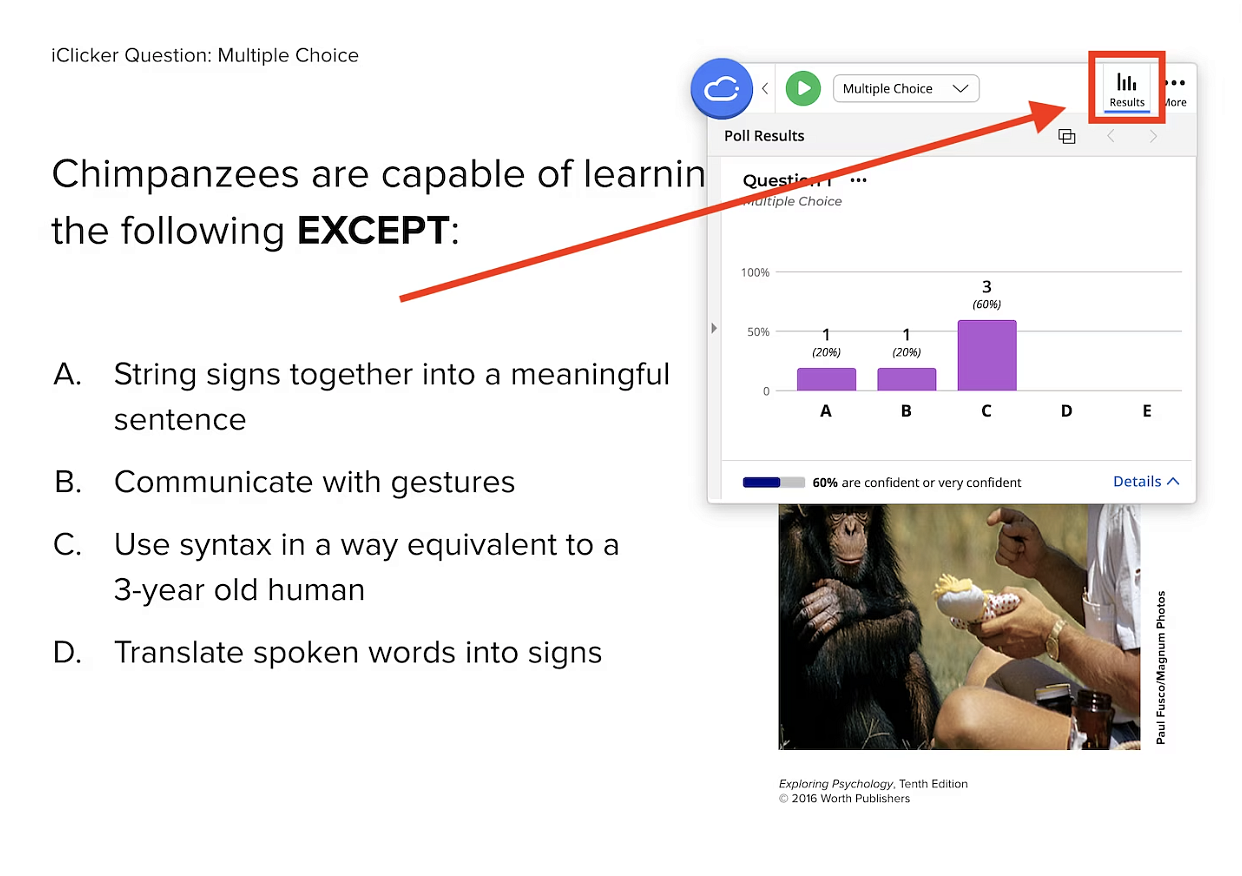
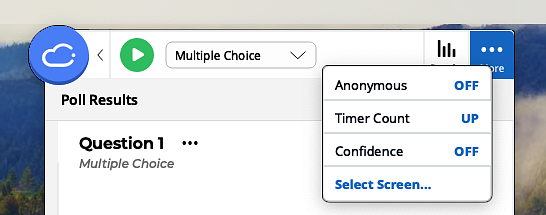
  • During your lecture, click the cloud icon on the toolbar and select 'Poll'. Choose the type of question (Short Answer, Multiple Choice, Multiple Answer, Numeric, or Target).

desktop menu bar


different types of poll responses from the menu dropdown


Step 2: Start Poll.
  • Press 'Play' to begin polling. A preview of your desktop capture will be displayed. 

Selecting the Screen your poll will capture and show students in an iclicker poll. Choosing a Google Chrome Screen of the polling questions on a slide
Step 3: Student Participation
  • Students respond to the poll. Students will receive a screenshot of the question to respond to on their devices.

Screenshot of student view of the iclicker polling question
Step 4: End Poll
  • Once enough responses are collected, click the red button to stop the poll.

menu bar


where to click to view the results of the poll


Part 4: Reviewing Responses

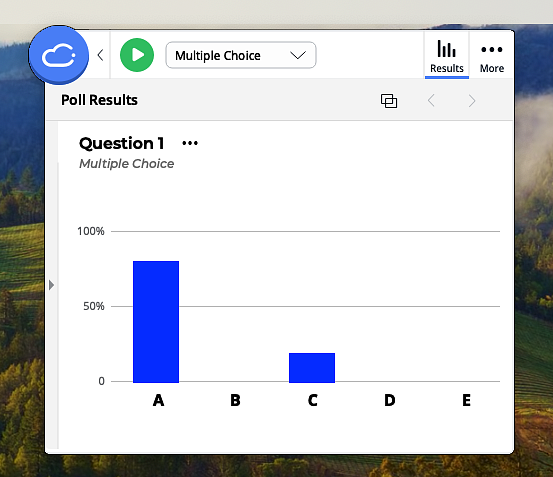
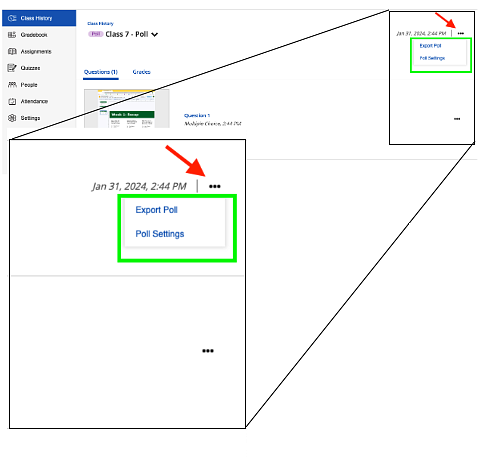
Step 1: View Results
  • Click 'Results' to see student responses. 

Data on the response rates per questions via a bar graph


Step 2:Grade Responses
  • Select the correct answers for grading. Multiple correct answers can be chosen if the question requires. 


Part 5: Special Poll Types

Step 1: Anonymous Polls
  • For anonymous questions, select 'Anonymous' from the options. Note that anonymous polls cannot be graded.

Additional menu features in the more button: Anonymous, timer count, Confidence, and selecting a screen


Part 6: Concluding the Class

Step 1: End Class with Exit Poll.
  • Close the iClicker polling software and opt to end with an exit poll for student feedback. 

desktop menu bar
Step 2: Download Exit Poll Responses
  • Access and download the feedback from the session details in the grade book. 


more button with additional settings including starting your class, deleting, or archiving your iclicker class


how to export a poll or change poll settings within the class history

iClicker Support

If you have additional questions, you can search or filter the iClicker Knowledge Base (link opens in a new tab)

You can also contact the following individuals directly: