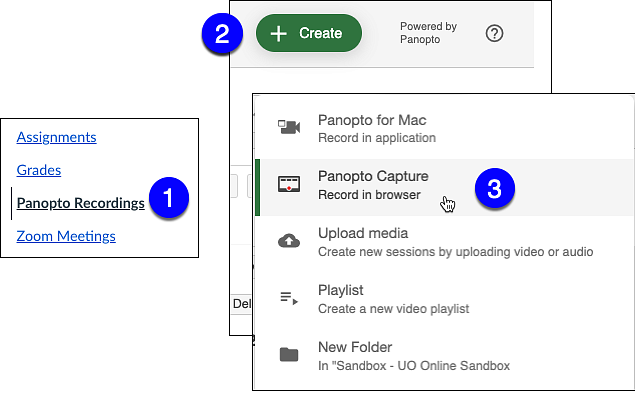
- In Canvas - click on the Panopto Recordings link on the Course Navigation Menu.
- Click on the + Create button at the top of the Panopto page.
- Select Panopto Capture from the Create drop-down menu.
The Panopto Recording interface will appear.
The Panopto Recording interface will appear.
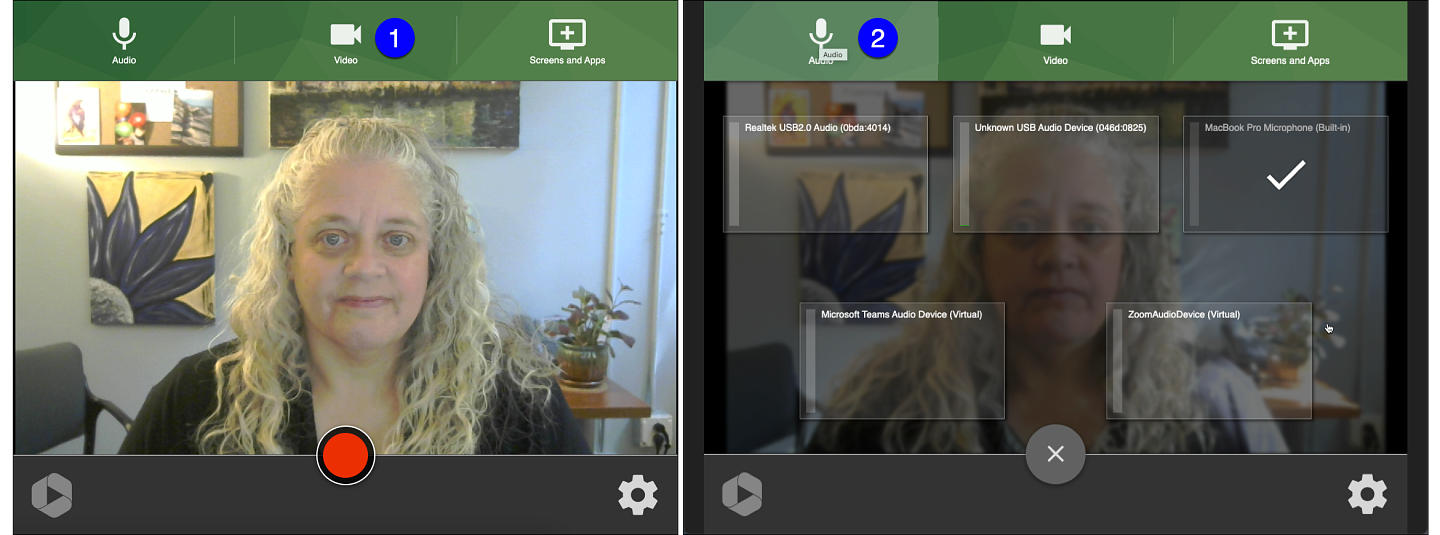
In the Panopto Recording interface, you'll need to set-up the Video and Audio inputs for your video.
The Video [1] screen will appear first where you can confirm the recording camera.
Click on Audio [2] on the top menu bar to select the audio source you'll be using.
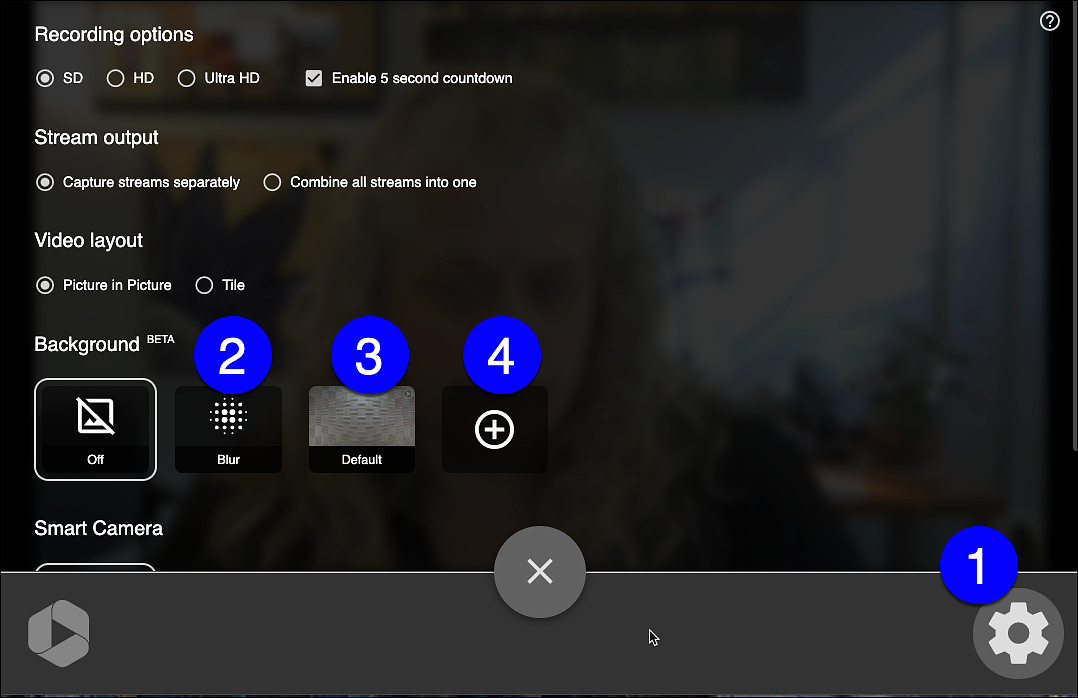
You can configure your background by selecting Options [1] (the gear icon in the bottom right corner). Here you can Blur your background [2], use the Default background [3], or add your own custom background [4]. Selecting Off displays your camera view with no background.
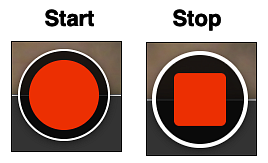
When everything is ready, select the red, circular Record button to begin recording your lecture. There will be a 5 second countdown timer before the recording begins.
When you are finished recording, select the same button which will now be a red square.
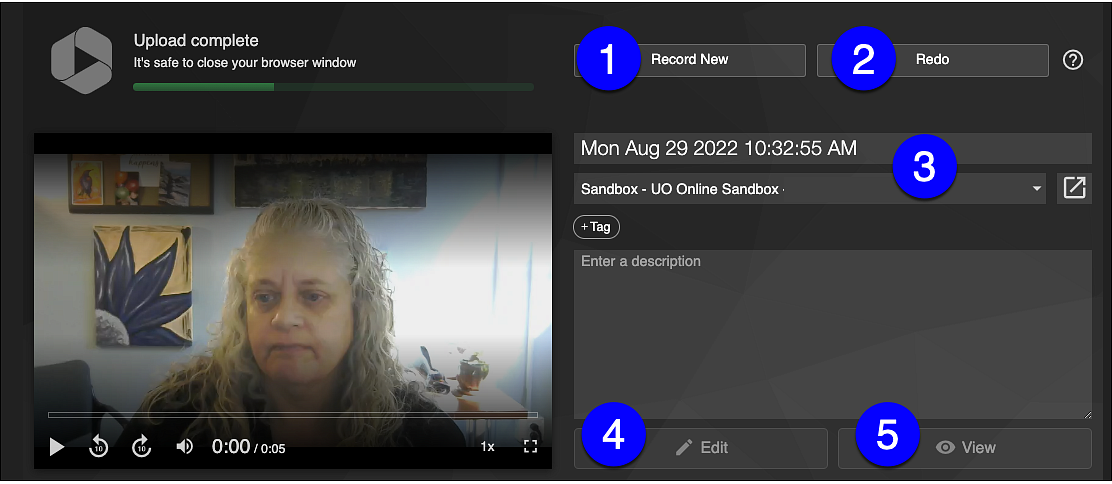
The Panopto Upload screen will appear. Your video will be automatically processed and added to your Panopto Video folder on Canvas. You have a few options here.
Once uploaded, your video can be reviewed and either embedded or linked to in your Canvas course. For more, see the Adding Panopto Videos to a Canvas Course How-To.