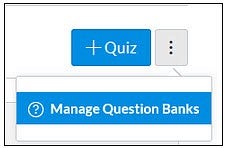
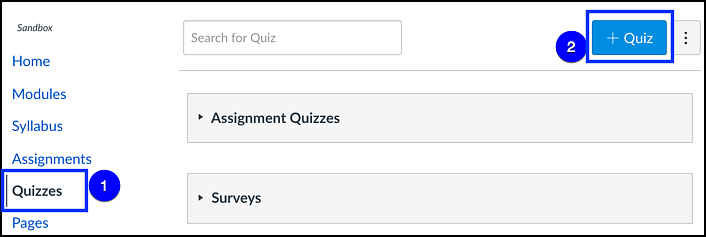
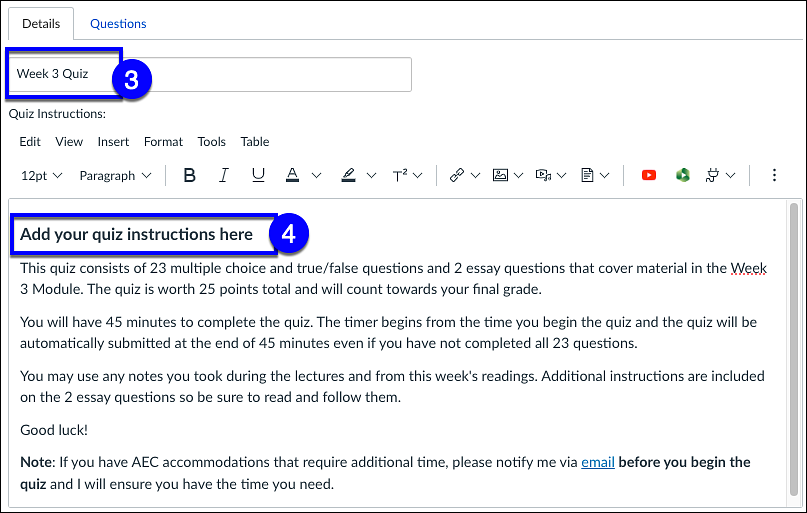
In Canvas select the Quizzes link [1] in the left-hand navigation menu and then select the +Quiz button [2] to create a quiz.
Add a descriptive quiz title [3] to make it clear to your students what the quiz is for and then add instructions for the quiz in the main text box [4]. Your instructions might include information about:
- How the exam is organized
- How long the exam will take
- What materials students can or cannot use
You could also consider including a short video using Panopto if you'd like to include more in-depth instructions or guidance for the quiz.
Continue setting-up the quiz options.
- Quiz Type and Assignment Group (if using)
- Shuffle Answers. Check the Shuffle Answers box to ensure that no two students see the exact same answer choices for multiple choice and multiple answer question types.
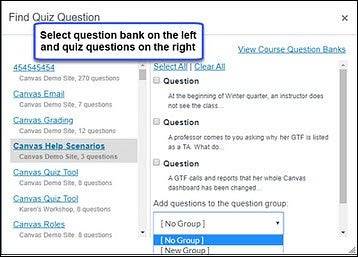
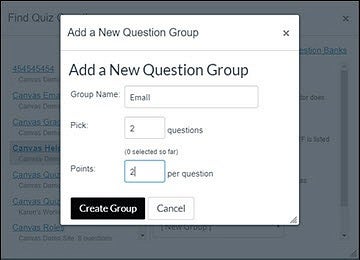
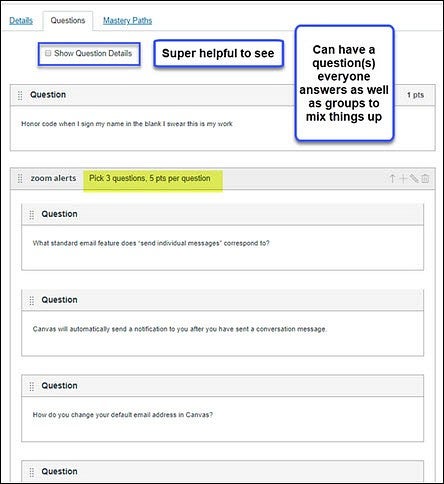
- Note: you will need to adjust wording for “all of the above” answers when using this setting since it will not always be the last choice. Consider using large question banks and randomizing the question delivery using question groups. See the "Adding Questions to Quizzes and Groups" section below.
- Time Limit. This option allows you to limit the total amount of time (in minutes) a student has to complete a quiz between the Available From and Until dates.
- Canvas will auto-submit the quiz once the time limit is up or the Until date passes (whichever is sooner). Students will receive a 5-minute warning before the quiz auto-submits.
- The time limit begins once students start the quiz and the timer does not stop if students navigate away from the Canvas screen for any reason.
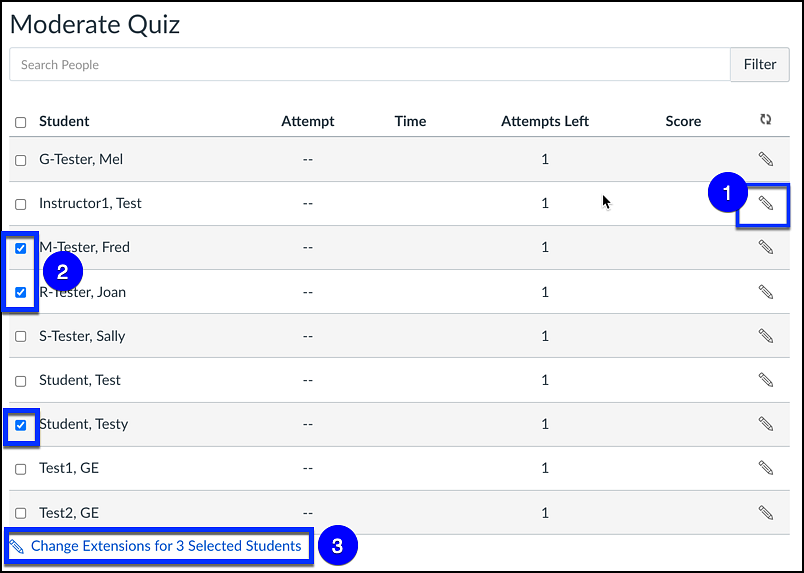
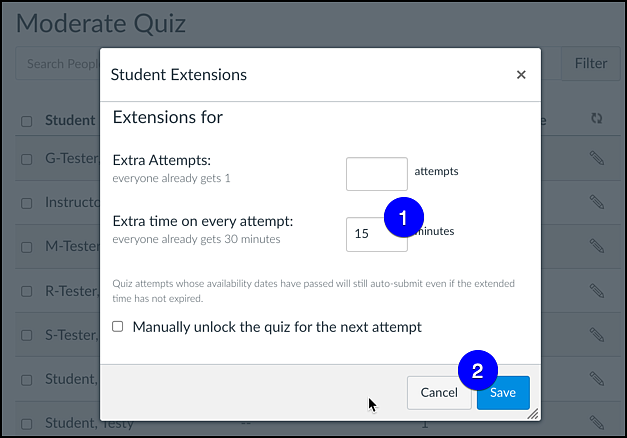
- When opting for a time limit, consider students who may have AEC accommodations for additional quiz time. The section below "Moderating Quizzes for AEC Accommodation" gives more detail on how to moderate or adjust quiz time limits.
- Allow Multiple Attempts. There may be times when you'd like students to have more than 1 attempt at the quiz. When you select this option, you will have 2 other options to select:
- Quiz Score to Keep. You can keep the highest score, the lowest score, or the average of all attempts.
- Indicate how many allowed attempts you'd like students to have.
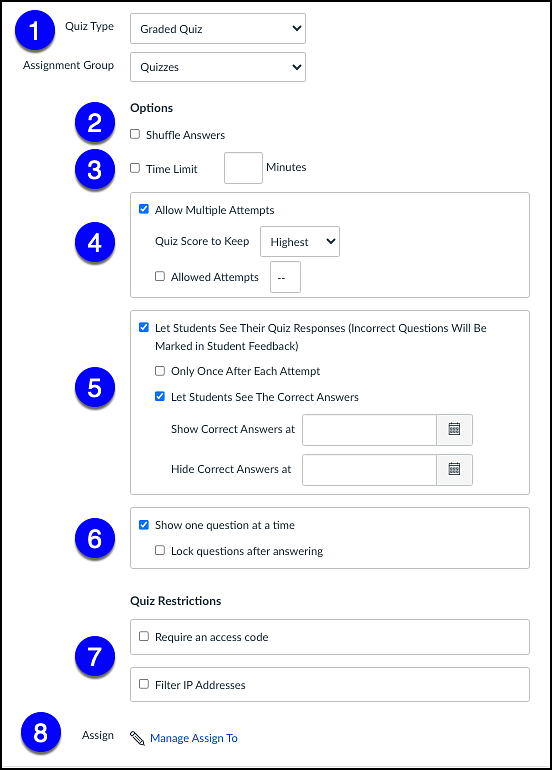
- Let Students See Their Quiz Responses. Selecting this option will open 2 additional options:
- Only once after each attempt
- Let students see the correct answers. Selecting this option allows you to indicate when students should be shown the correct answers.
- Show one question at a time. Selecting this option allows students time to focus on each question before moving to the next one. This can be helpful for lengthy quizzes. Once checked, you can also lock questions after answering to prevent students going back to alter previous answers.
- Quiz Restrictions. Do not Require an access code (this is used for proctored exams) and do not Filter IP Addresses.
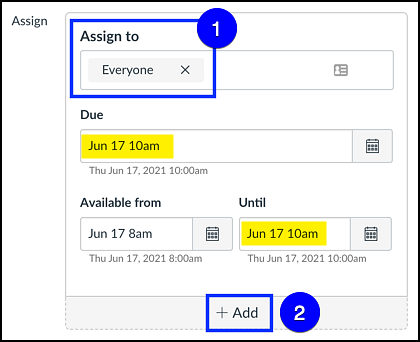
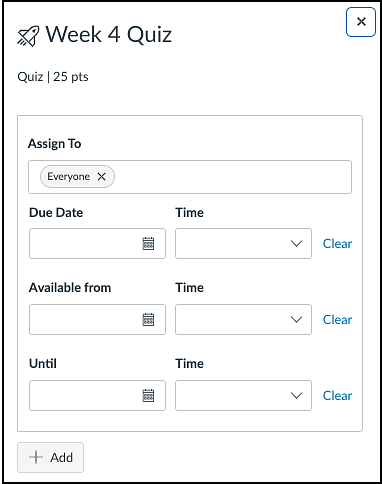
- Assign. Here is where you'll assign the quiz to the entire class, to specific sections, groups, or to individual students. Click the Manage Assign To link to open the Assign To option box.
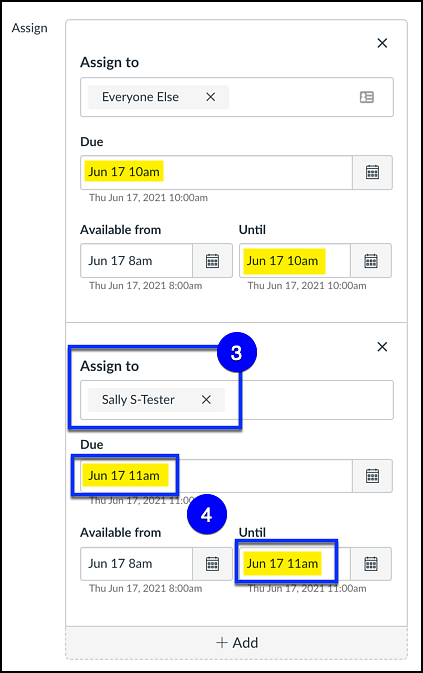
To assign to specific groups or students, begin typing the group or student name in the Assign to box.
The Due Date and Time is when the quiz must be submitted to count as an on-time submission. A "Due Date" is NOT the same as the "Until" setting.
- Due Dates allow for late submissions. Due Dates do not trigger automatic quiz submissions at the due day and time.
- Until is a hard stop and prevents students from accessing or continuing a quiz after the Until Date. Quizzes with an Until Date set will automatically submit a student's quiz responses at that day and time.
Available From and Until. If you'd like to set a specific date and time period for all students to take a quiz, the best way is to use the Available From and Until fields.
- Available From is the date and time a published quiz becomes available and students can access and begin the quiz.
- Until date is an optional grace period that allows students to submit after the Due date. Submissions made after the Due date but before the Until date are marked as late. If used, this date is a hard stop. Students can no longer start or continue the quiz after this date and time.
- Like the time limit option, setting the Available From and Until fields sets the quiz to auto-submit with a 10-second warning to the student.
- If you want to mark quizzes as late, you must also set the Due date.
Important Quiz Considerations
If you are going to set a time limit, be careful about how you set-up your Available From and Until dates as this can cause issues for students.
For example, if you want students to have 120 minutes to complete a quiz, do not set the Available From and Until dates to be that 120 minutes. In the example at right, students who start the quiz at 2:15pm on March 17th will not be given the full 120 minutes to complete the exam as it will be automatically submitted at the hard stop Until time of 4:00pm.

In this case, it would be better to set the 120 minute time limit (see #3 above) with a Due date. If you want to prevent students for accessing the quiz at a certain time, make sure that time is well past the 120 minute time limit.
See the section Moderating Quizzes for AEC Accommodations for those cases where you must use Available From and Until.
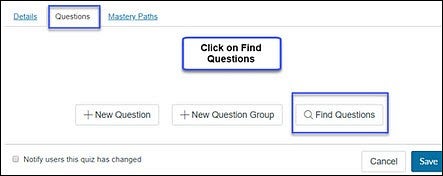
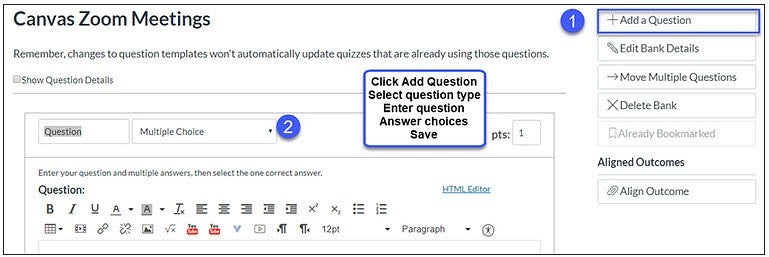
Now you are ready to add questions to your quiz.

